Showing posts with label file. Show all posts

Friday, September 29, 2017

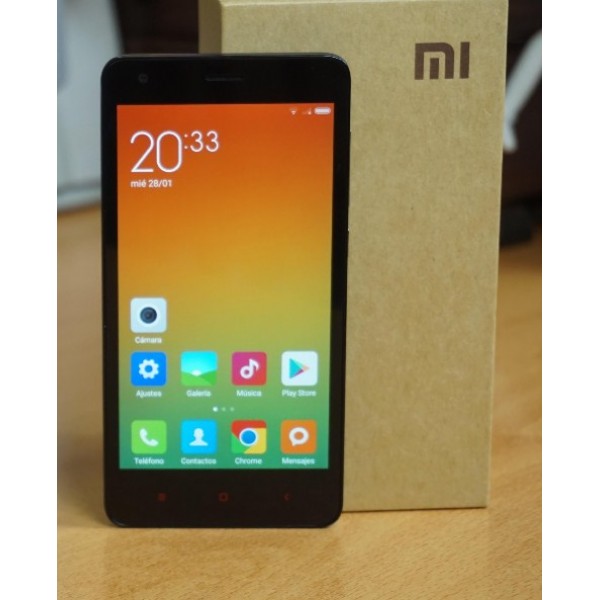
Xiaomi Redmi 1S v6 7 1 0 Firmware Flash File Free

Xiaomi Redmi 1S v6 7 1 0 Firmware Flash File Free


Xiaomi Redmi 1S v6.7.1.0 Firmware Flash File

Xiaomi Redmi 1S v6.7.1.0 Firmware Flash File

First step to Install Firmware

  1. Download Xiaomi File Tool
  2. Download Xiaomi USB Driver

How To Install ROM Xiaomi Redmi 1S v6.7.1.0

  1.  Turn off the device. Press the Volume� key and the Power button at the same time to enter Fastboot mode. Then connect the device to the Windows PC/laptop via a micro USB cable
  2. Double click on the downloaded ROM file to decompress it. Open the file folder for the      decompressed ROM pack, and copy its path on the computer.
  3. Decompress the MIUI ROM flashing tool downloaded, and double click on it to install (if there is security warning, select �Run�). After installation is completed, open MiFlash.exe and paste into the address bar the ROM file folder path copied in the last step.
  4. Click on the first button (circled out in yellow) to Refresh, and MiFlash should automatically recognize the device. Then click the second button (circled out in red) to flash the ROM file to the device
  5. After flashing process, starts, it might take up to 5-10 minutes. So, keep patience and wait
  6. Like this post? Hit the share buttons below to share this article with your friends on Facebook, Google+ and Twitter.

download file now

Read more »

Samsung J5 Prime SM G570F DS Frp Remove 100 Working File Solution

Samsung J5 Prime SM G570F DS Frp Remove 100 Working File Solution


Download Samsung Factory Binary ( Combination ) COMBINATION_OJV_FA60_G570FXXU1APJ2_OJV1APJ2.zip
After Download unzip combination firmware and u will find this file inside COMBINATION_OJV_FA60_G570FXXU1APJ2_OJV1APJ2_CL9555 172_QB11274596_REV00_user_mid_noship.tar.md5
Now Select This File In Z3X or Miracle Box or Any Samsung Flashing Tool ( uncheck all files except Sboot.bin and Boot.img )
Now Connect Your Phone In Download Mode ( Vol - + Home btn + power btn )
and write flash ( note :- only flash Sboot.bin and Boot.img no need to flash entire firmware )
and after flashing complete your phone will reboot to normal wait for complete boot.
once your phone come in normal mode your phone adb mode should become enable.
now with z3x or any other tool Reset FRP in ADB mode.

Go to setting in phone and make factory reset from menu than flash phone back to original firmware worked like a charm with the version 6.0.1 (G570F)

download file now

Read more »

Thursday, September 28, 2017

Firmware Meizu M2 Note Free Flash File

Firmware Meizu M2 Note Free Flash File


Deteil Firmware : Meizu M2 Note MT6753
Firmware Version : 5.0
Download firmware-nya dibawah ini :
Meizu_M2_Note_signed_MT6753_fileTo_flashtool
NOTE :
  • Free flash file [without password]
  • Laporkan admin jika link diatas mati/rusak
  • Jika berkenan tolong tinggalkan komentar sewajar-nya


    download file now

    Read more »

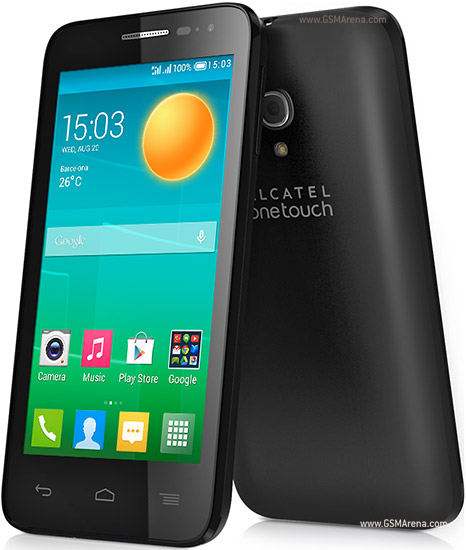
    Alcatel OT5038A MT6582 Firmware Flash File Free

    Alcatel OT5038A MT6582 Firmware Flash File Free


    Alcatel OT5038A MT6582 Firmware Flash File

    Alcatel OT5038A MT6582 Firmware Flash File

    First step to Install Firmware 

    1. Download and install MTK  Android USB drivers
    2. Download And Install SP Flash Tool

    How To Flash Alcatel OT5038A 

    1. First, you need to download and install sp flash tool
    2. Download and install MTK  Android USB drivers
    3. Then download Firmware file/Flash file/ROM for your phone
    4. Your phone must have 50 % charging before this process
    5. switch off your mobile remove the battery (if removable) reinsert the battery and plug the USB cable in charging socket
    6. Now open SPflash tool.exe
    7. When sp flash tool open, go to download button in sp flash tool
    8. In download tab, click on scatter load button
    9. After locating the scatter tab, click on the download button
    10. Now connect your smartphone with a USB cable and press volume up or volume down key for easy detection (remove and re-insert your phone battery if it is removable)
    11. Now flashing is completed, a green ring will appear in sp flash tool
    12. Close sp flash tool on your computer and unplug phone
    13. Power on the phone and enjoy
    14. After flashing process starts, it might take up to 5-10 minutes. So keep patience and wait.
    15. See detailed Instruction MT flashing sp tool with images


    Download Link

    download file now

    Read more »

    Wednesday, September 27, 2017

    Wiko Lenny2 Stock Firmware Flash File Free

    Wiko Lenny2 Stock Firmware Flash File Free


    Image result for Wiko Lenny 2

    Wiko Lenny2 Stock Firmware Flash File

    First step to Install Firmware

    1. Download and install MTK  android USB drivers
    2. Download And Install SP Flash Tool

    How To Flash Wiko Lenny2

    1. First, you need to download and install sp flash tool
    2. Download and install MTK  android USB drivers
    3. Then download Firmware file/Flash file/Rom for your phone
    4. Your phone must have 50 % charging before this process
    5. switch off yourmobile remove the battery (if removable) reinsert the battery and plug the USB cable in charging socket
    6. Now open SPflash tool.exe
    7. When sp flash tool open, go to download button in sp flash tool
    8. In download tab, click on scatter load button
    9. After locating the scatter tab, click on the download button
    10. Now connect your smart phone with a USB cable and press volume up or volume down key for easy detection (remove and re insert your phone battery if it is removable)
    11. Now flashing is completed, a green ring will appear in sp flash tool
    12. Close sp flash tool on your computer and unplug phone
    13. Power on the phone and enjoy
    14. After flashing process starts and might take up to 5-10 minutes. So keep patience and wait.
    15. See detailed Instruction MT flashing sp tool with images

    Download Link

    download file now

    Read more »

    ZenFone 6 Rooted System img file

    ZenFone 6 Rooted System img file


    Asus ZenFone 6 Pre rooted image file. This System.img file is build from latest 2.22.40.44 WW version. Its clean and Neat, All application present no removed application.  All files is odex aditional with supersu.apk and binary we inject the super deamon su for Stability of Root.

    Requirmetnts :

    Asus Zenfone 6 Version 2.22.40.44 .

    The build is System.img only so your system is required to match the build version to system.img file
    If you came from lower Version Then  you need to flash Boot.img fastboot.img recovery.img and other BIN files

    Thsi is A test version because i dont have an Asus ZenFone 6  So please Comment below .
    For manual Flash Follow this Command

    fastboot flash system.img

     Download Links :
    https://drive.google.com/file/d/0B8Vlzc8R44GiOWJrbGJYUDJqT2M/view?usp=sharing
    Thanks..

    download file now

    Read more »

    Maxx AXD11 Andrtoid 4 4 2 Firmware Flash File Free

    Maxx AXD11 Andrtoid 4 4 2 Firmware Flash File Free


    Image result for Maxx AXD11

    Maxx AXD11 Andrtoid 4.4.2 Firmware Flash File

    First step to Install Firmware

    1. Download and install MTK  Android USB drivers
    2. Download And Install SP Flash Tool

    How To Flash Maxx AXD11

    1. First, you need to download and install SP flash tool
    2. Download and install MTK  Android USB drivers
    3. Then download Firmware file/Flash file/ROM for your phone
    4. Your phone must have 50 % charging before this process,
    5. switch off your mobile remove the battery (if removable) reinsert the battery and plug the USB cable in charging socket
    6. Now open SP flash tool.exe
    7. When SP flash tool open, go to download button in SP flash tool
    8. In download tab, click on scatter load button
    9. After locating the scatter tab, click on the download button
    10. Now connect your smartphone with a USB cable and press volume up or volume down key for easy detection (remove and re-insert your phone battery if it is removable)
    11. Now flashing is completed, a green ring will appear in SP flash tool
    12. Close SP flash tool on your computer and unplug phone
    13. Power on the phone and enjoy
    14. After flashing process, starts, it might take up to 5-10 minutes. So, keep patience and wait.
    15. See detailed Instruction MT flashing SP tool with images


    download file now

    Read more »

    Tuesday, September 26, 2017

    VIDEO Install Drivers Flashing VoLTE modem file

    VIDEO Install Drivers Flashing VoLTE modem file


    Hello friends.... From the date the VoLTE patch has been released, I am getting like 100 mails everyday on the problem users facing while they were flashing the modem file.. And a lot of my followers asking me to make a video tutorial on all the topic from " Installing drivers to flashing Modem File in Zenfone 2 laser ZE550KL.. So i decided to make a video and here we go....

    This Video have  2 parts.. Part 1 Indicate that how to install the drivers correctly for all Asus Devices. And the second part will be go through flashing GUIDE of VOLTE image for Zenfone 2 LASER ZE550KL..

    If you are facing any ISSUE below then you must watch this video..
    1. After entering the command , It says <wetting for devices > (SOLVED)
    2. If you are facing issue to open command window (Watch this video to know)
    3. Driver Related Confusion..

    NOTE: Flash the VOLTE image if you are having trouble to flash VOLTE file in your Asus Zenfone 2 LASER ZE550KL

    DOWNLOADS :

    1. ADB drivers ( Click Here to Download)
    2. Asus Usb Drivers (Click Here to Download) 
    3. VoLTE image file for Asus Zenfone 2 LASER ZE550KL(Click Here to Download)

    4. If you are having trouble to watch this video online, then click here to Download this video.. Its is 7ZIP format.. I compressed the video in around 32MB , After extraction the video will be like 100MB

    If you have trouble to watch the video online then you can also download the video by clicking on 
    this link
    This is my first Video tutorial with my OWN voice.. I  was scared little bit but i did it.. Sory about the voice.. Voice quality is low because i dont have a dedicated mic, I recorded it with my laptops inbuilt MIC..

    ONLINE YOUTUBE PLAY


    I hope you guys can the idea from This post.. If you still have problem then Send EMAIL to me

    Admin ZenFone Blog
    "-Vinaya"


    download file now

    Read more »

    Xiaomi Mi 4i V6 7 2 0 Firmware Flash File Free

    Xiaomi Mi 4i V6 7 2 0 Firmware Flash File Free


    Image result for Xiaomi Mi 4i

    Xiaomi Mi 4i V6.7.2.0 Firmware Flash File

    First step to Install Firmware

    1. Download Xiaomi File Tool
    2. Download Xiaomi USB Driver

    How To Install ROM Xiaomi Mi 4i V6.7.2.0

    1.  Turn off the device. Press the Volume� key and the Power button at the same time to enter Fastboot mode. Then connect the device to the Windows PC/laptop via a micro USB cable
    2. Double click on the downloaded ROM file to decompress it. Open the file folder for the      decompressed ROM pack, and copy its path on the computer.
    3. Decompress the MIUI ROM flashing tool downloaded, and double click on it to install (if there is security warning, select �Run�). After installation is completed, open MiFlash.exe and paste into the address bar the ROM file folder path copied in the last step.
    4. Click on the first button (circled out in yellow) to Refresh, and MiFlash should automatically recognize the device. Then click the second button (circled out in red) to flash the ROM file to the device
    5. After flashing process, starts, it might take up to 5-10 minutes. So, keep patience and wait
    6. Like this post? Hit the share buttons below to share this article with your friends on Facebook, Google+ and Twitter.


    download file now

    Read more »

    Monday, September 25, 2017

    Wiko Rainbow Stock Firmware Flash File Free

    Wiko Rainbow Stock Firmware Flash File Free


    Wiko Rainbow Stock firmware | flash file

    Wiko Rainbow Stock Firmware Flash File

    First step to Install Firmware 

    1. Download and install MTK  android USB drivers
    2. Download And Install SP Flash Tool

    How To Flash Wiko Rainbow

    1. First, you need to download and install SP flash tool
    2. Download and install MTK  android USB drivers
    3. Then download Firmware file/Flash file/Rom for your phone
    4. Your phone must have 50 % charging before this process
    5. switch off your mobile remove the battery (if removable) reinsert the battery and plug the USB cable in charging socket
    6. Now open SP flash tool.exe
    7. When SP flash tool open, go to download button in SP flash tool
    8. In download tab, click on scatter load button
    9. After locating the scatter tab, click on the download button
    10. Now connect your smart phone with a USB cable and press volume up or volume down key for easy detection (remove and re insert your phone battery if it is removable)
    11. Now flashing is completed, a green ring will appear in SP flash tool
    12. Close SP flash tool on your computer and unplug phone
    13. Power on the phone and enjoy
    14. After flashing process starts, it might take up to 5-10 minutes. So, keep patience and wait.
    15. See detailed Instruction MT flashing SP tool with images

    Download Link

    Download Link

    download file now

    Read more »

    Wiko Ridge 4G Stock Firmware Flash File Free

    Wiko Ridge 4G Stock Firmware Flash File Free


    Wiko Ridge 4G Stock firmware | flash file

    Wiko Ridge 4G Stock Firmware Flash File

    First step to Install Firmware

    1. Download and install MTK  android USB drivers
    2. Download And Install SP Flash Tool

    How To Flash Wiko Ridge 4G

    1. First, you need to download and install SP flash tool
    2. Download and install MTK  android USB drivers
    3. Then download Firmware file/Flash file/Rom for your phone
    4. Your phone must have 50 % charging before this process
    5. switch off your mobile remove the battery (if removable) reinsert the battery and plug the USB cable in charging socket
    6. Now open SP flash tool.exe
    7. When SP flash tool open, go to download button in SP flash tool
    8. In download tab, click on scatter load button
    9. After locating the scatter tab, click on the download button
    10. Now connect your smart phone with a USB cable and press volume up or volume down key for easy detection (remove and re insert your phone battery if it is removable)
    11. Now flashing is completed, a green ring will appear in SP flash tool
    12. Close SP flash tool on your computer and unplug phone
    13. Power on the phone and enjoy
    14. After flashing process starts, it might take up to 5-10 minutes. So, keep patience and wait.
    15. See detailed Instruction MT flashing SP tool with images
    Download Link

    download file now

    Read more »

    Sunday, September 24, 2017

    Firmware Evercoss A28B Free Flash File 100 Tested

    Firmware Evercoss A28B Free Flash File 100 Tested


    Download firmware-nya dibawah ini :
    Evercoss_A28B_140110_ForFlashtoolFromReadBack_140610-152726


    NOTE :
    • Laporkan admin jika link diatas rusak/mati
    • Tolong tinggalkan komentar dengan sopan dan santun


    download file now

    Read more »

    Huawei R7 MT6580 Firmware Flash File 100000 Tested by Rafa Telecom

    Huawei R7 MT6580 Firmware Flash File 100000 Tested by Rafa Telecom


    Brand : alps 
    ProdName : full_magc6580_we_l 
    ProdModel : R7 
    Device : magc6580_we_l 
    AndroidVer: 5.1 
    MTKxCPU : MT6580 
    MTKxPRJ : ALPS.L1.MP6.V2_MAGC6580.WE.L_P35 


    [Read Ok] : preloader_magc6580_we_l.bin 
    [Read Ok] : lk.bin 
    [Read Ok] : boot.img 
    [Read Ok] : recovery.img 
    [Read Ok] : logo.bin 
    [Read Ok] : secro.img
    [Read Ok] : system.img 
    [Read Ok] : cache.img 
    [Read Ok] : userdata.img 


    [ScatCFG] : MT6580 / V1.1.2 / magc6580_we_l / EMMC 
    Android Info saved 
    MAUI Meta DB saved 
    HWConfig Info saved 
    FW Size : 1496 MiB 
     Scatter saved to : C:UsersGSM HIMEL BDHuwei r7MT6580__alps__R7__magc6580_we_l__5.1__ALPS.L1.MP6.V2_MAGC6580.WE.L_P35 
    All done!


    MT6580__alps__R7__magc6580_we_l__5.1__ALPS.L1.MP6.V2_MAGC6580.WE.L_P35
     File 100% working Guarantee
    Call +8801710131113
    Whatsapp +8801710131113

    download file now

    Read more »

    Firmware Lenovo A6000 Flash To Qfill Tested Flash File

    Firmware Lenovo A6000 Flash To Qfill Tested Flash File


    Info software :


    Sedikit saja penjelasan penggunaan file ini :
    1. Matikan handphone lenovo a6000+
    2. Tekan tombol volume atas dan bawah dan power secara bersamaan 
    3. Pilih "DOWNLOAD" dan handphone otomatis masuk mode qualqom 9008/eDL
    4. Selanjutnya ekseskusi menggunakan QFILL tool ,Ufi Box dll

    Download firmware-nya dibawah ini :
    Kraft-A6000+user 4.4.4 KTU84P Kraft-A6000+s_S017_151016 release-keys

    NOTE :
    • Free flash file
    • Laporkan admin jika link diatas mati/rusak
    • Jika berkenan tolong tinggalkan sedikit komentar

    download file now

    Read more »

    Saturday, September 23, 2017

    Cara membuka File Manager Saat Android bootlop AROMA FILE MANAGER

    Cara membuka File Manager Saat Android bootlop AROMA FILE MANAGER


    Step 1: Duplicate The Background Layer

    With our image open in Photoshop, the first thing we need to do for this effect is duplicate our Background layer, which is the only layer we currently have in our Layers palette and contains our original image:
    Adobe Photoshop tutorial Photoshop effects image.
    Photoshops Layers palette showing the Background layer which contains the original image.
    We need to make a copy of this layer so that we avoid doing anything to our original image information. To make a copy of the layer, use the keyboard shortcut Ctrl+J (Win) / Command+J (Mac). Photoshop duplicates the layer for us, places the copy above the original Background layer in the Layers palette, and names the copy "Layer 1":
    Adobe Photoshop tutorial Photoshop effects image.
    Press "Ctrl+J" (Win) / "Command+J" (Mac) to duplicate the Background layer.

    Step 2: Add A New Channel

    At the beginning of this tutorial, I mentioned that we can use something called a Depth Map with the Lens Blur filter to specify how much blurring to apply to different areas of the image, and were going to begin creating our Depth Map right now. The term "Depth Map" is really nothing more than a cool name for what is essentially just a selection in Photoshop, and to create one, we first need to add a new channel, so switch over to your Channels palette which youll find by default grouped in beside the Layers palette:
    Adobe Photoshop tutorial Photoshop effects image.
    Photoshops Channels palette.
    In the Channels palette, youll see what looks like four layers, except that these are channels, not layers, and theres really only three of them. The one at the top, named "RGB", is just the composite of the three color channels below it, named "Red", "Green", and "Blue". The Red, Green and Blue channels combine to create all the colors we see in our image, and thats already more than we need to know for this tutorial, but if you want to learn more about them, be sure to check out our RGB and Color Channels Explained  tutorial.
    We need to add a new channel, so click on the New Channel icon at the bottom of the Channels palette (its the icon directly to the left of the trash bin icon):
    Adobe Photoshop tutorial Photoshop effects image.
    Add a new channel by clicking on the "New Channel" icon.
    Photoshop adds a new channel for us below the other channels and names it "Alpha 1":
    Adobe Photoshop tutorial Photoshop effects image.
    A new channel is added below the others and named "Alpha 1".
    As soon as you add the new channel, youll see your image turn completely black, and thats because what were now looking at is the new channel, not the image, and the channel is currently filled with black. What weve just added here is called an alpha channel, as opposed to the color channels above it, which is why Photoshop named it "alpha 1". If alpha channels are new to you, dont worry about them. Well cover alpha channels fully in another tutorial, but for now, alpha channels are just selections, the same as if you were creating a selection with the Rectangular Marquee Tool or the Lasso Tool. This is just a fancier way of making a selection, but its still just a selection. In fact, if you were to drag out a selection with, say, the Lasso Tool and then save your selection, it would be saved as an alpha channel. Were going to be using this alpha channel to tell Photoshop where we want the blurring effect to be applied at full strength, where we want it to be applied at less than full strength, and where we dont want any blurring to be applied at all, and were going to do that by painting on our alpha channel with white using the Brush Tool, as well do next.

    Step 3: Select The Brush Tool

    As I mentioned, were going to be painting on our new alpha channel with white to create our Depth Map, and to do that, we need the Brush Tool, so select it from the Tools palette:
    Adobe Photoshop tutorial Photoshop effects image
    Select the Brush Tool in Photoshop.

    Step 4: Lower The Opacity Of The Brush To 50%

    With the Brush Tool selected, go up to the Options Bar at the top of the screen and lower the brushs Opacity to50%:
    Adobe Photoshop tutorial Photoshop effects image
    Lower the opacity of the brush to 50%.
    When creating our Depth Map, any areas we leave as pure black in the alpha channel will have the blurring effect applied to them at full strength. Any areas we paint with pure white will not have any blurring applied to them at all, and any areas we paint with some shade of gray will have blurring applied to them at various strengths depending on how close that shade of gray is to black (full strength blurring) or white (no blurring). By setting our brush to 50% opacity, this allows us to slowly build up areas of blurring and non-blurring as we paint on the alpha channel, instead of just saying "I want 100% blurring here and 0% blurring here" with nothing in between.

    Step 5: Turn The RGB Channel On

    Currently, our image is filled with black, which makes it a little difficult to see what were painting over in the image, so lets fix that. While still in the Channels palette and with "Alpha 1" still active (you know its active because its highlighted in blue), click inside the empty box to the left of the "RGB" Channel at the top. When you do, youll see the eyeball icon appear inside the box (it will also appear in the empty boxes of the Red, Green and Blue channels since, as I mentioned earlier, the RGB channel is just the composite of the other three channels), which tells us that the channel is now visible:
    Adobe Photoshop tutorial Photoshop effects image
    Make the "RGB" channel visible by clicking in the empty box to the left of the channel in the Channels palette. An eyeball icon will appear inside the box.
    With the RGB channel visible, if we look back at our image, we see that it is no longer filled with solid black. Instead, its overlayed with red which allows us to see our image underneath:
    Adobe Photoshop tutorial Photoshop effects image
    With the RGB channel visible, the image now appears overlayed in red.
    Dont worry, our image is not actually covered in red. Were still looking at the alpha channel, not the image itself. The red just makes it easier for us to see what were doing. The areas overlayed with red at full strength (which at the moment is the entire image) represent areas filled with pure black on the alpha channel. As we paint with white on the alpha channel with our brush, which well do in a moment, we wont see white appearing in the image. Instead, the red will begin to disappear in the areas we paint over, as if were erasing the red with our brush, revealing more of the original image in those areas. The less red there is covering an area, the less blurring will be applied there when we go to use the Lens Blur filter.
    If we were to paint with white with our brush set to 100% opacity, we would be completely removing the red from any area we paint over, which would mean that no blurring at all would be applied to those areas, while 100% blurring would be applied everywhere else, giving us an "all or nothing" situation. But since weve lowered the opacity of our brush to 50%, the more times we paint over the same area, the more white well be adding to that area on the alpha channel and the more the red will disappear in that area in the image. This gradual build-up of white on the alpha channel (and gradual lessening of the blurring effect applied to the image) is what gives us so much control with the Lens Blur filter, much more than we could ever get using the Gaussian Blur filter, at least not without using a layer mask (although technically, the Lens Blur filters Depth Map and a normal layer mask are really the same thing, but well save that for another tutorial).

    Step 6: Paint With White On The Alpha Channel To Control The Blurring Effect

    With my Brush Tool selected and my brush opacity lowered to 50%, Im going to make sure my Foreground coloris set to white so that Ill be painting with white, and then Ill begin creating my Depth Map by painting on the alpha channel to control how much blurring will be applied to different areas of the image.
    For this image, I want to reduce the amount of blurring that will be applied to the womans face in general, so with a large, soft-edged brush, Im simply going to click once over her face:
    Adobe Photoshop tutorial Photoshop effects image
    Clicking once over the womans face with a large, soft-edged brush to reduce the amount of blurring that will be applied to that part of the image.
    To change the size of your brush, use the left and right arrow keys on your keyboard. The left bracket key makes the brush smaller and the right one makes it larger. To make the edges of your brush nice and soft, hold down your Shift key and press the left bracket key a few times. Holding Shift and pressing the right bracket key a few times makes the brush edges harder.
    Its a bit hard to see in the image, but after clicking once over the womans face, which added some white to that area on the alpha channel, some of the red in that area has disappeared. The area I clicked on will now have a bit less of a blurring effect applied to it when we go to use the Lens Blur filter. The rest of the image will have blurring applied at a full 100%.
    I want to reduce the blurring amount even further over her eyes, nose and mouth, so Im going to press my left bracket key a few times to reduce the size of my brush and then Im going to paint in one continuous motion over her eyes, nose and mouth, making sure not to release my mouth button at any point while Im painting so I maintain the same level of white across that whole area, which will maintain the same reduced blurring amount:
    Adobe Photoshop tutorial Photoshop effects image
    Painting a second time over a smaller area with a smaller brush to reduce the amount of blurring in those areas even further.
    Its now becoming a bit easier to see that the red is disappearing from the areas Ive painted on, as I increase the amount of white in those areas on the alpha channel. I think I want to reduce the amount of blurring even further over her lips and eyes, so Im going to keep my brush the same size and just paint once again over those areas:
    Adobe Photoshop tutorial Photoshop effects image
    Painting once again over the womans lips and eyes to reduce the blurring that will be applied further still.
    We can now definitely see the original image showing through the red in those areas, which means they will receive the least amount of blurring, and since were using a soft-edged brush, well get smooth transitions between the different levels of blurring.
    Finally, I want to really bring focus and attention to the womans eyes so I dont want any blurring being applied to them at all. To make sure no amount of blurring is applied to them, Im going to simply click a few times with my brush over each eye, filling those areas with pure white on my alpha channel and removing any hint of red from them in the image:
    Adobe Photoshop tutorial Photoshop effects image
    Clicking several times with the brush over the womans eyes to fill those areas with pure white on the alpha channel and prevent any blurring from being applied to them.
    Ive now completed the work on my alpha channel and I can go ahead and use it as my Depth Map with the Lens Blur filter, which Ill do next, but before we do that, if I want to see what my alpha channel really looks like, all I need to do is click once again on the eyeball icon to the left of the RGB channel in the Channels palette to turn the channel off again, which will leave only the "Alpha 1" channel visible, and I can now see exactly where Ive painted with white on it at various opacity levels. The two areas that appear brightest on the alpha channel are where I clicked several times over her eyes:
    Adobe Photoshop tutorial Photoshop effects image
    Turn off the visibility of the RGB channel to see the alpha channel in its true black and white form.
    We have our Depth Map. Now lets put it to work.

    Step 7: Select The RGB Channel And Then Switch Back To The Layers Palette

    Still in the Channels palette, click directly on the RGB channel at the top to actually select it rather than simply making it visible. This will turn off the alpha channel at the same time, and well see our image once again as we normally would in the document window:
    Adobe Photoshop tutorial Photoshop effects image
    Click directly on the RGB channel in the Channels palette to select it, which makes it visible and hides the alpha channel.
    Once youve selected the RGB channel, switch back to the Layers palette and make sure that "Layer 1" is currently selected. Just as with channels, the currently selected layer is highlighted in blue. Click on "Layer 1" to select it if it isnt already selected.

    Step 8: Apply The Lens Blur Filter

    Were ready to blur our image with the Lens Blur filter. To do that, go up to the Filter

    download file now

    Read more »

    Alcatel One Touch Pixi 4007X Firmware Flash File Free

    Alcatel One Touch Pixi 4007X Firmware Flash File Free


    Alcatel One Touch Pixi 4007X Firmware Flash File

    Alcatel One Touch Pixi 4007X Firmware Flash File

    First step to Install Firmware

    1. Download and install MTK  Android USB drivers
    2. Download And Install SP Flash Tool

    How To Flash Alcatel One Touch Pixi 4007X

    1. First, you need to download and install sp flash tool
    2. Download and install MTK  Android USB drivers
    3. Then download Firmware file/Flash file/ROM for your phone
    4. Your phone must have 50 % charging before this process
    5. switch off your mobile remove the battery (if removable) reinsert the battery and plug the USB cable in charging socket
    6. Now open SPflash tool.exe
    7. When sp flash tool open, go to download button in sp flash tool
    8. In download tab, click on scatter load button
    9. After locating the scatter tab, click on the download button
    10. Now connect your smartphone with a USB cable and press volume up or volume down key for easy detection (remove and re-insert your phone battery if it is removable)
    11. Now flashing is completed, a green ring will appear in sp flash tool
    12. Close sp flash tool on your computer and unplug phone
    13. Power on the phone and enjoy
    14. After flashing process starts, it might take up to 5-10 minutes. So keep patience and wait.
    15. See detailed Instruction MT flashing sp tool with images


    Download Link

    download file now

    Read more »